MacOS Mojave’s New Gallery View displays EXIF Metadata for Images
New Gallery views are now available in the Finder in macOS Mojave. This mode replaces Cover Flow (which itself has been borrowed from iTunes’ era) and makes it easier to skim through big previews of your files and visually identify those you are searching for.
Furthermore, macOS’s Preview pane now displays EXIF metadata, allowing you to use a visual interface to manage media assets like photos.
How is metadata related to images?
Information about any file is stored in metadata. Images have information called EXIF data. We will not distinguish between the general file metadata and EXIF data for the purposes of this tutorial.
When you take a photo with a device (say, an iPhone), metadata is created. Photoshop, for example, may add new metadata such as the version number or author as you make edits to the image.
Aside from that, EXIF data can also be manually edited in specialized apps such as AnyEXIF. Metadata records supported by the software include image dimensions, title, resolution, camera model, location, shutter speed, ISO, date and time, ownership information, descriptions, thumbnails, and more.
iPhone, iPad, & Mac Supporting Metadata
iOS and macOS both support writing, reading and displaying metadata. Despite the fact that iOS interprets metadata in situations such as viewing images on a world map, it does not make it available to the end-user. Essentially, you cannot view or edit EXIF metadata on iOS without a third-party app.
See the video below to remove location data and other EXIF data from iPhone.
Finder’s new Gallery view makes it easy to view detailed metadata for any image stored on your Mac, as I briefly mentioned earlier.
You can view your photos’ metadata, including location information and detailed EXIF information, by following the step-by-step instructions in the next section.
Image Metadata on Mac:
Using the Finder, you can access the EXIF image metadata in its entirety.
- To open a new Finder window, click the Finder icon in the Dock.
As an alternative, select the Finder by clicking the desktop, and selecting File menu > New Finder Window or by pressing Command (⌘)-N on the keyboard.
- Select a desired folder with the Finder window selected.
- On the top of the Finder window, hover your mouse over the rightmost icon.
TIP: The key combinations Command (*)-4 and Option (*)-4 in the Finder window can also be used. Alternatively, click the View menu in a Finder window and select the option As Gallery.
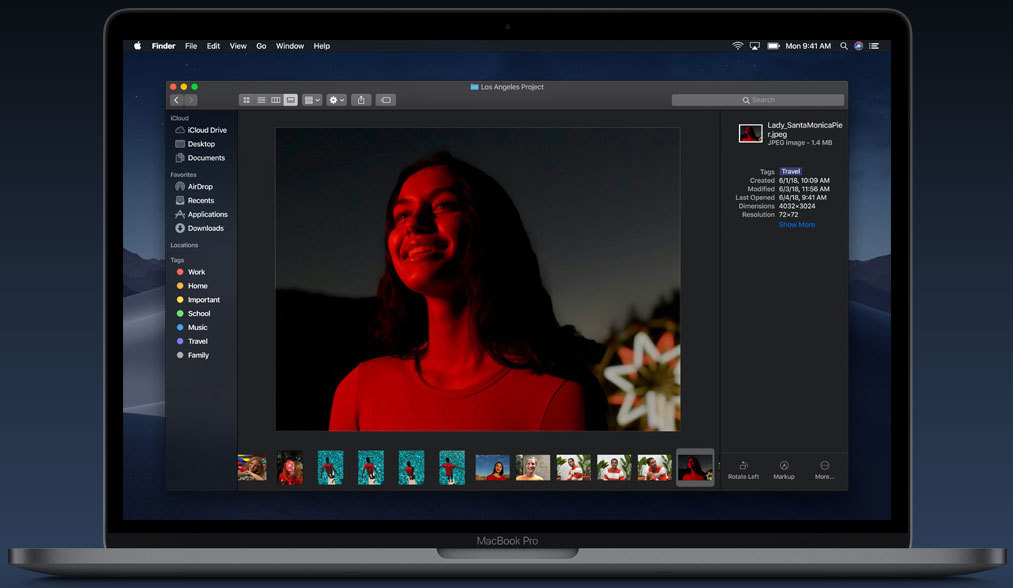
You will see two areas in your Finder window when the Gallery view is active.
By scrubbing through the thumbnails at the bottom, you can scroll through the rest of your images, and the rest of the window is taken up by a big preview of your selected file. When in Dark Mode, the Gallery view looks the best. The combination of Dark Mode and Gallery view makes your images stand out more.
- Select the Show Preview option from the View menu to enable the Preview pane.
Turn the Preview pane on or off as needed.
TIP: To show or hide the Preview pane on the keyboard, press the keys Command (*)-Option (*)-P simultaneously. The Preview pane displays all of the file’s metadata and can be enlarged or shrunk by dragging the divider.
- The metadata of a selected photo appears in the Preview column on the right.
In addition, since this allows you to quickly view EXIF details such as the camera model, aperture, and exposure without having to open the file in an image editor like Preview or Pixelmator, it makes checking out details super simple.
An image’s metadata may include the location where it was taken
MacOS Mojave’s new gallery: Quick Actions are also important

This tutorial is not about how to use Quick Actions, a new feature in macOS Mojave that allows you to edit basic images right from the Quick Look interface or Gallery view. Quick Actions are located right beneath the Preview pane.
The list of actions will vary depending on the file type. You may see the option to mark up a PDF or another one to password-protect the document when you highlight it, for example. When you select a video file, Quick Actions will display in the toolbar for that video, such as Trim and Rotate Left (or Rotate Right, if the Option key is held down while clicking the icon).
As a final step, if you select a photo from your computer, the Quick Actions provide access to the Markup interface and the ability to rotate the photo by 90 degrees counterclockwise. Assign an Automator task as a Quick Action, or work on multiple files at once.
Previously, macOS Mojave’s Cover Flow model was replaced with the Gallery view. Combining the Finder’s Gallery view with Quick Actions and metadata in the Preview Pane is a powerful combination. There are a few other Finder improvements and system-wide improvements in Mojave, like a feature called Stacks which automatically organizes messy desktops into related groups.